Say goodbye to disastrous wallpaper incidents! If it’s time to update your room, on time and under budget, stencils are an excellent option. You may need to get your hands dirty, but the money you save will allow you to splurge on something else you really want, such as furniture, lighting, accessories, etc.
Patterns ans colours
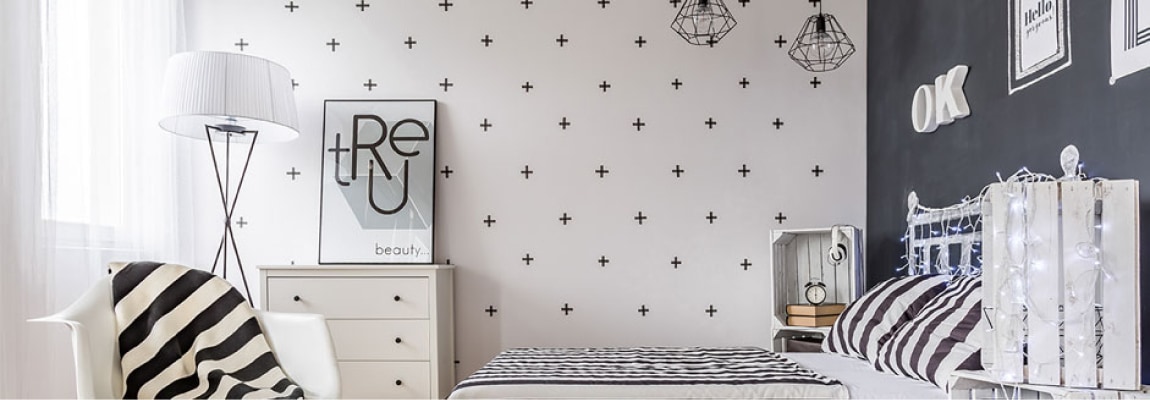
The first thing you’ll need to do is find the right pattern: big, small, single, repeated, tone-on-tone, contrasting, etc. The possibilities are endless. What you choose will depend on the effect you want to create.
For an accent wall in a room where the furniture and accessories are the same colour, add some contrast with a repeating pattern in a contrasting colour to create a focal point.
A more detailed pattern, such as a damask or mandala, will look beautiful with a monochromatic colour scheme. To achieve this, choose a colour one shade darker or lighter than the colour of your wall. The results will be stunning.

Materials required
- new stencil sheet
- X-acto knife
- cutting mat (optional)
- pen or printer
- template (to cut out stencil)
- measuring tape
- level
- masking tape or painter’s tape
- 2 in 1 latex paint and primer in the colour of your choice
- foam brush or roller
- paint rags
Before you begin
If the wall has a significant architectural detail, for example, a fireplace, window, couch, tv console, etc., centre your pattern in relation to it and work outwards.
If the wall is large and empty, start just under the ceiling line, then repeat the pattern outwards and downwards. Patience is key!
How to stencil a wall
- Choose a pattern that will be repeated on your wall. Decide on the wall(s) to stencil to determine the size of the pattern. Draw or print the pattern. Tape your pattern under a stencil sheet.
- Cut pattern out of stencil sheet with an X-acto knife and cutting mat. You can cut freehand by following the lines of the pattern through the transparent stencil sheet, or for cleaner lines, use a ruler, bowl, cup, etc.
- Clean, repair, repaint wall as needed. Remove wall plates and outlet covers.
- Distribute your pattern evenly on the wall. To do so, find the centre of the wall using a measuring tape and level. Mark it with a pencil or make a cross with painter’s tape.
- Once your first marking is in place, position other markings by measuring the space needed for each pattern, horizontally and vertically. Marking everything first can seem long and laborious, but it’s worth it. Once it’s done, the rest will be much easier.
- Tape your stencils on markings – and paint!
- Remove your stencil and repeat step 6 as many times as needed.
- When your design is complete, remove any tape left on the wall. Wait at least 2 days to put back wall plates and outlet covers, and at least 20 days before hanging or leaning anything on or against the wall.
Tips and tricks
Use tape instead of a pencil to create marks for stencils. This will minimize unnecessary scribbling on your wall, as well as endless touch-ups.To visualize and decide on the size of your pattern, print different sizes in different formats. Cut them out and tape them to the wall to get a better idea of the final result.Have a rag or sponge handy to wipe excess paint off your stencil and prevent smudges.Use foam rollers for stencils. They come in different sizes to accommodate different stencil patterns and sizes.For added dimension, use paint in a different finish from your wall, for example, semi-gloss patterns on an eggshell finish.For a lighter, yet glamorous feel, create a tone-on-tone look by using the same colour paint, but in a different finish, for example, glossy black patterns on a black mat wall.
